Today, more than ever, ticks have become a fact of life. Mother Nature endowed these tiny, sometimes dangerous parasites with all the physical attributes they need to survive and thrive: latch on to an unsuspecting passerby, firmly attach to their human or animal host, and feed on their blood. Ticks actually secrete a sophisticated, organic “glue” to cement their mouth parts to their host, so removing them can be tricky.
Daily checks and prompt removal of ticks from your dog is especially important to minimize exposure to tick-borne diseases that can be passed on while the tick is attached.
Learn the do’s and don’ts of removing these pesky parasites, as well as how to protect your cat or dog and their environment to prevent future infestation. Below are five steps that can help you safely remove ticks from your dog.
Tick Detection & Removal
Step 1: Check for Ticks
- Make it a habit to check your pet daily for ticks, especially if she spends time outdoors in wooded or grassy areas.
- When you or your pet return from being outdoors, carefully check clothing, exposed body parts and hair for these notorious hitchhikers, especially during summer months.
- Ticks are especially fond of a dog’s head and neck, ears, face, and belly, so check these areas thoroughly.
- Ticks can be found in any outdoor location with vegetation, even in manicured Suburbia.
- Contrary to popular myth, ticks don’t hibernate and can remain active year-round - even in colder climates - if temperatures rise above freezing.
Step 2: Detect a Tick
- Run your hands over your dog or cat feeling for lumps or small bumps under her hair.
- Remember that a tick can be as tiny as a pinhead or as large as a lima bean if it is engorged.
Step 3: Remove the Tick
Step 4: Dispose of the Tick
- Relocate the tick to a tightly sealed jar or plastic baggie in case identification becomes necessary by your vet.
- Monitor your pet and the bite for 2-3 weeks following removal. If you notice any changes in your cat or dog’s appetite, energy level or mobility, contact your vet.
- If your pet shows no signs of illness after 2-3 weeks, dispose of the tick by flushing it down the toilet.
Step 5: Cleanse
- Cleanse the affected area with mild soap and water, then a disinfectant to prevent infection.
- Be sure you wash your hands, too.
What NOT To Do
Ticks attach to people and pets with great tenacity. They insert their mouthparts deep into the skin and secrete a substance that cements them to their host. When a tick is fully engorged with blood, they discharge enzymes which dissolve the glue-like solution, allowing them to detach and fall off.

Gently pull upward when using tweezers to remove ticks.
There are many folklore remedies you may have heard of to remove ticks from both people and pets. It is imperative that you avoid these methods. The goal is to remove the tick quickly without provoking it or waiting for it to detach.
- Avoid squeezing the body of the tick during removal. Administering pressure to a tick may cause it to release fluid (which could include disease-causing bacteria, infection, and other microorganisms) into your pet’s bloodstream.
- Do not attempt to use nail polish, petroleum jelly, alcohol or heat. These ‘techniques’ are not effective and let the tick remain attached for longer than desired.
- Don’t smother the tick. Ticks can live several hours without air. Attempting to smother a tick with Vaseline, nail polish etc. will only extend the window of opportunity for the tick to transmit dangerous bacteria to its host.
- Never burn the tick with a hot match or cigarette. Once embedded, it can take time for a tick to detach itself from its host, even if it’s strongly motivated. Burning the tick may kill it, but won’t make it fall off any faster and you’ll pose unnecessary risk to your cat or dog.
- Don’t stress or traumatize the tick. Any of the above methods can cause the tick to regurgitate its stomach “guts” (which may be filled with dangerous bacteria) back into its host, increasing the risk of infection.
How quickly must a tick be removed?
Remove the tick as soon as you find it because you can never be sure how long it has been attached. Generally, it takes at least 24 hours for an infected tick to transmit a bacterial infection to its host.
What if some of the tick is left behind?
The short answer is, probably nothing. Even if you carefully remove the body and head, it is not unusual for the mouth (called the hypostome) to remain attached. Eventually the body will naturally “eject” the remains. Just be sure to wash the area with soap and water to prevent infection.
Using Tick Preventatives
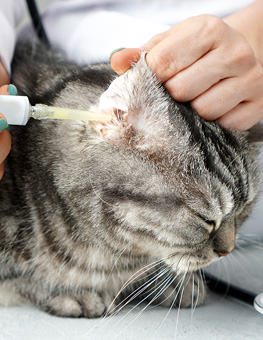
Cats and dogs are very susceptible to tick bites. Vaccines are not available for most tick-borne diseases and do not stop ticks from making their way into your home or onto your pet. For these reasons, it’s important to use preventative products to reduce the chances that a tick will bite and make your companion sick.
- If you see ticks walking around on a pet or in the home, flea and tick sprays and powders can be used.
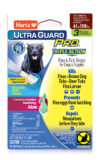
- To prevent ticks from biting your cat or dog, use topical drops or collars such as the Hartz® UltraGuard Plus® and Hartz® UltraGuard PRO® lines, because they contain active ingredients that target killing all three stages of the tick life. However, you should always do routine inspections on your animal even with product application.
- Ticks that are killed should be placed in a small sealable and insecticide treated container before discarding.
- You may find ticks that are embedded even though they are dead. Follow the above instructions for removal.
- As a further measure of treatment, you can provide a barrier by using yard sprays to achieve residual control of ticks on your lawn, gardens and shrubs.
Hartz® UltraGuard Pro® Flea and Tick Drops for Dogs and Puppies 61-150lb
Hartz® UltraGuard Pro® Flea & Tick Collar for Cats and Kittens


